Designing a database schema for a REST API
How to start designing a database schema with DB Designer

In this article we will be exploring ways to design data models for a REST API application.
We are using an online tool that helps in stubbing out database tables and columns and in establishing relationships between them.
The tool is DB Designer, available here). As an exercise, let's design data models for an application that keeps track of health points.
We can imagine an application where participants tracks points based on daily healthy activities, like how much water they drink, how healthy they eat, how much exercise they do, and so on.
Participants create competitions with other users of the application for who gets the most points. To keep track of points, users create entries and are given points based on the number of health activities they have accomplished.
Initial data models
Designing data models for our application involves figuring out how the application is going to work. Our application may have stakeholders that give us clues on which data models we might need.
When talking to stakeholders, we should pay attention to three things:
which entities may be in our application
which properties these entities may have and how they are related
how we can translate these entities and properties into tables and columns in our database
For our sample application we may have entities like Participants, Goals, and Entries.
As you can see, we already might have identified some possible database tables to work with. We may not need all these tables in the final application, or we may need extra ones, but for now let's just capture what we have in our design tool.
Working with DB Designer
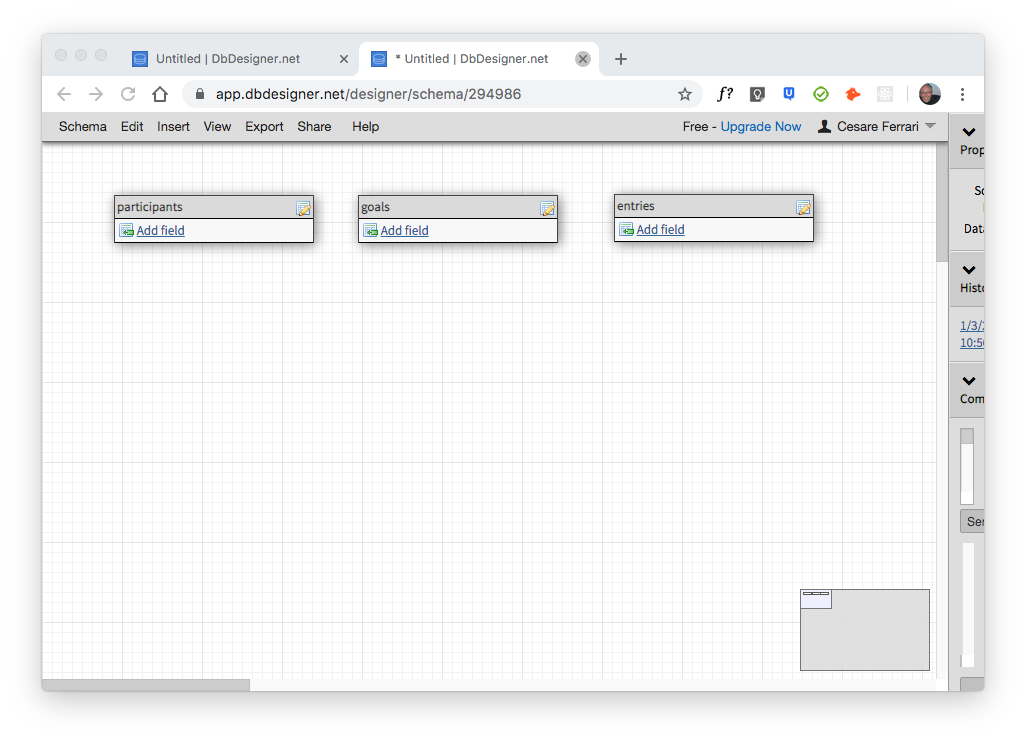
Once we log into DB Designer, we are presented with a blank canvas. If we right-click on the page, we are shown a menu of options where we can choose to add tables that we can name according to the entities we have identified earlier.
Note that I prefer to name my tables with a plural noun, because they represent a collection of records. Also, to be consistent, I use lowercase letters and underscores for all table names.
If you use other naming conventions, like camelCase for example, know that some database systems, like PostgreSQL, require you to enclose camelCase table names inside double quotes, and might generate an error if you don't do that.
Table names that are lowercased and underscored don't have this requirement, that's why I prefer to use that simpler syntax.
Here's a screenshot of what we have achieved so far:

Now that we have some tables to work with, we can start thinking about properties these entities may have.
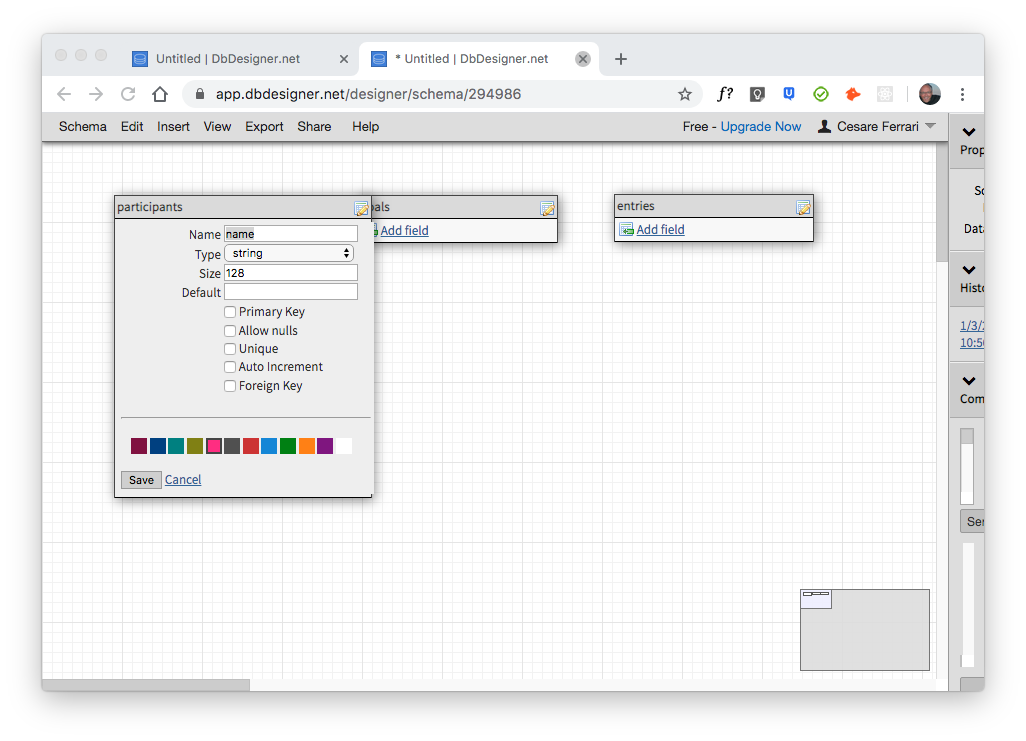
For example, the Participant model will probably have a property called name, which is the name of the participant.
If we click on "Add field" inside our table card in DB Designer, we can add the fields for these properties.
In the "Add field" window we give a name to the field, and we choose what type of field this is (a string in this case). We can also make other choices, like limiting the character size, accepting NULL values, etc.

Another field we may need for a participant is an id. This will be our primary key that makes our records unique and gets auto incremented by the database.
We may add other fields as well, for email, username, and so on.
Data relationships
Our tables will likely have relationships with each other.
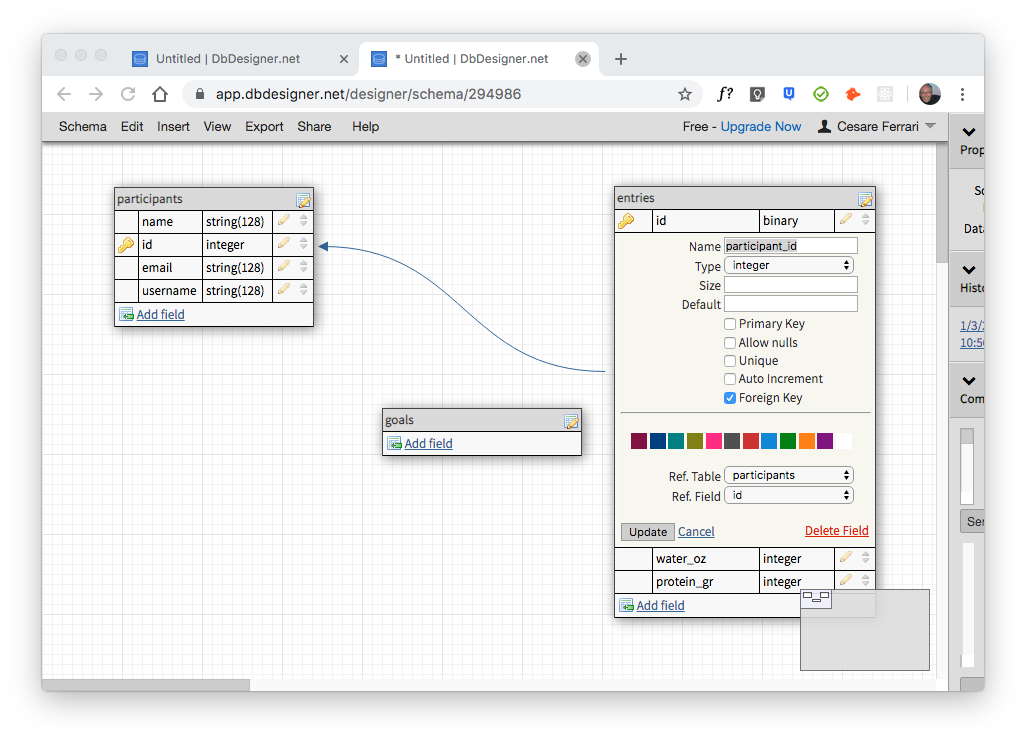
For example, if we look at the entries table, we can easily imagine it having a relationship with the participants table because each participant creates entries, so entries belong to participants. The relationship would be "one to many", meaning one participant has many entries.
In this kind of relationship, the entries table needs to keep track of which participant the entry belongs to. It does that with a foreign key that refers to the participant id.
Given these considerations, we need to add a column called participant_id to the entries table. participant_id is a foreign key, because it refers to the id column of the participants table.
DB Designer allows us to make this connection by selecting the appropriate fields when we create the column. It will also visually show an arrow that specifies the direction of the connection between the two tables.

We could go on creating other tables and columns, but I think you get the gist of the exercise now. Feel free to practice creating tables and columns in the application database schemas to get a good feel for data model design.
It's better to spend a little more time upfront thinking of the schema and catching anomalies and difficulties early, than start creating an application without a clear idea on how to structure it. Starting out with a half-baked structure will certainly lead to frustration and wasted time.
Did you like this article? Share it with your friends.
I write daily about front-end and back-end web technologies.
You can receive all my articles in your inbox by subscribing to my newsletter. Just click the button below. No spam, just good, useful content. Guaranteed!
